To create a tour you go to Products and click Add Product.
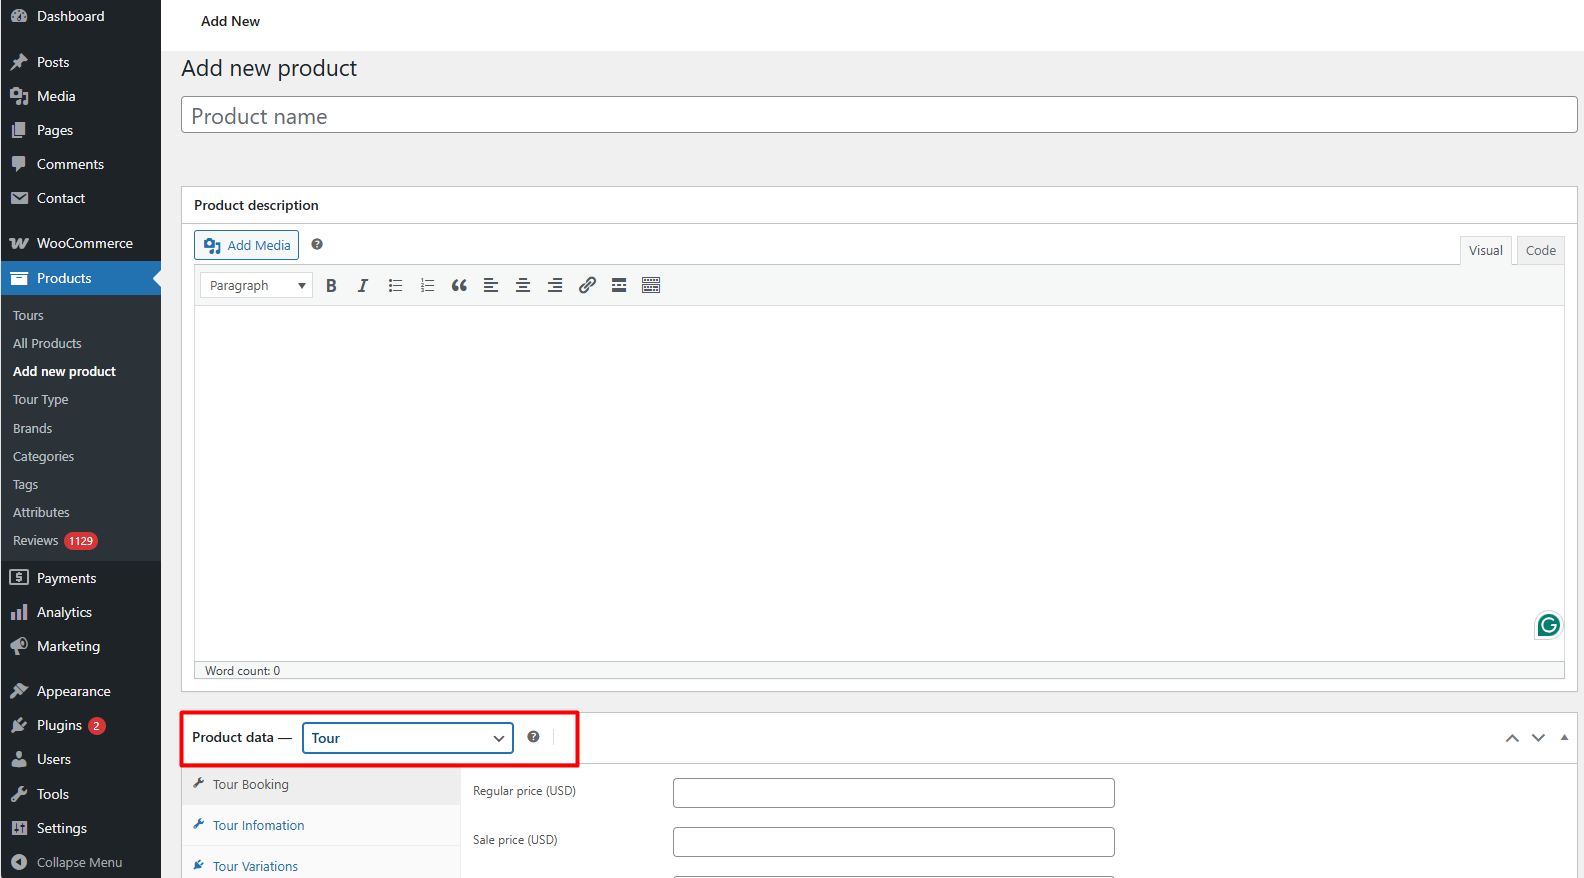
- Tour name
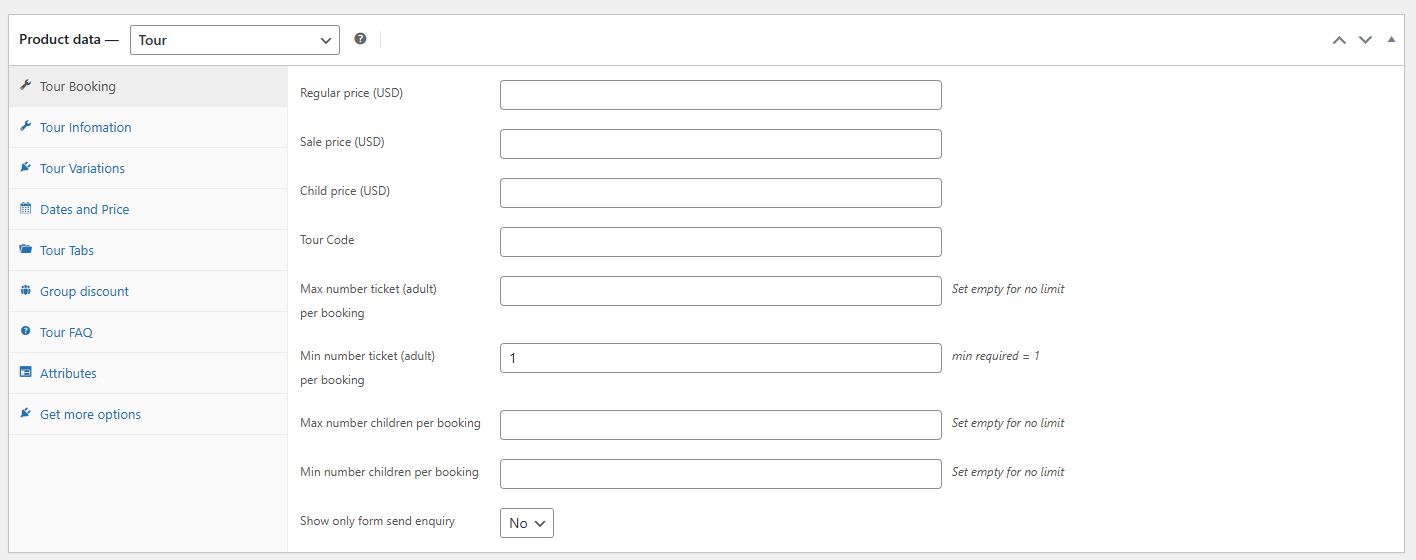
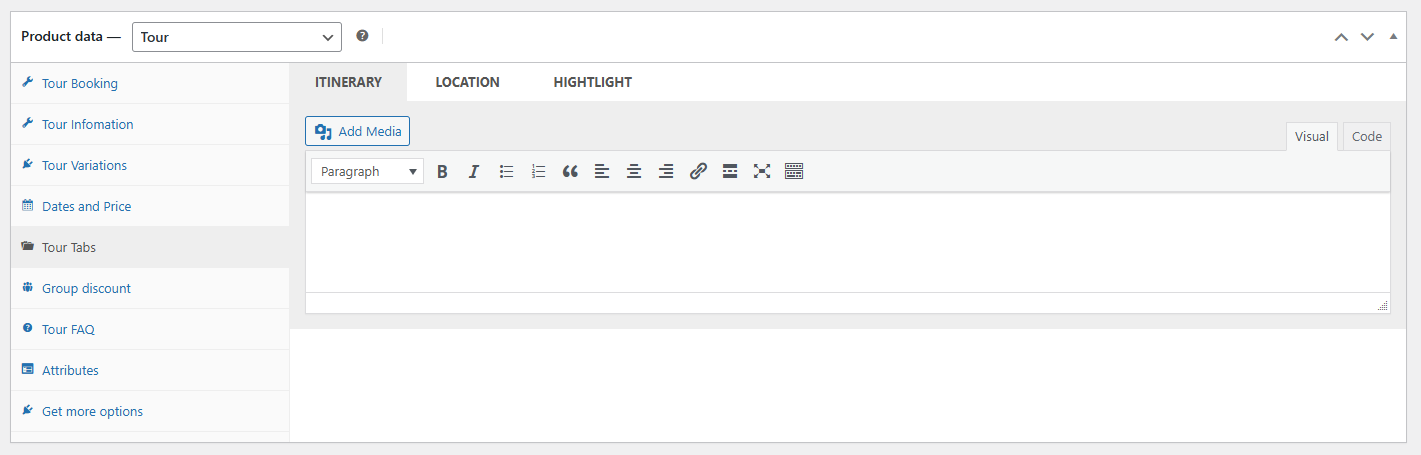
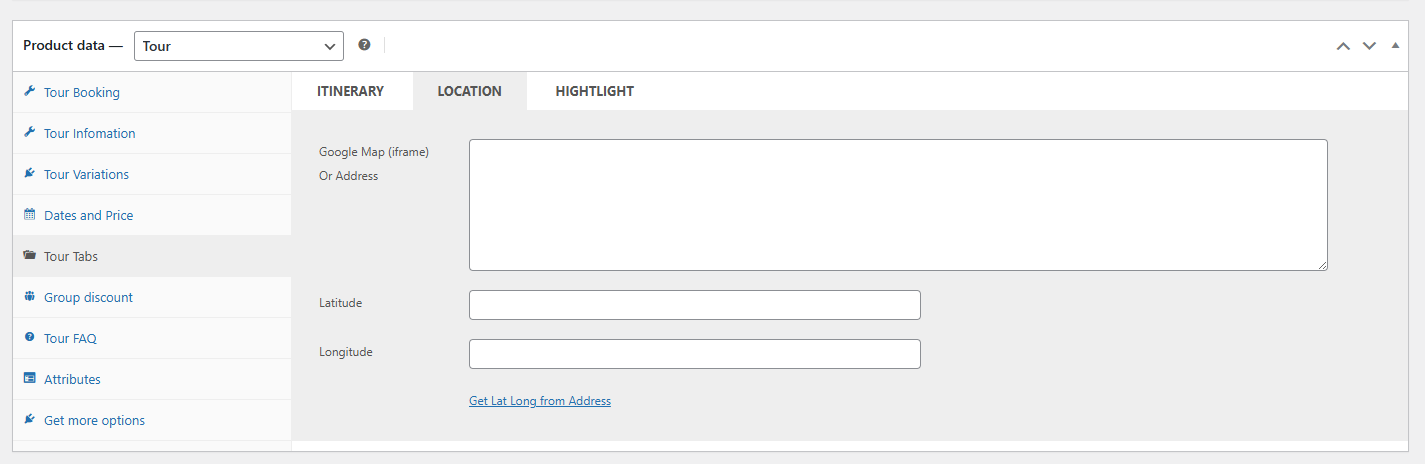
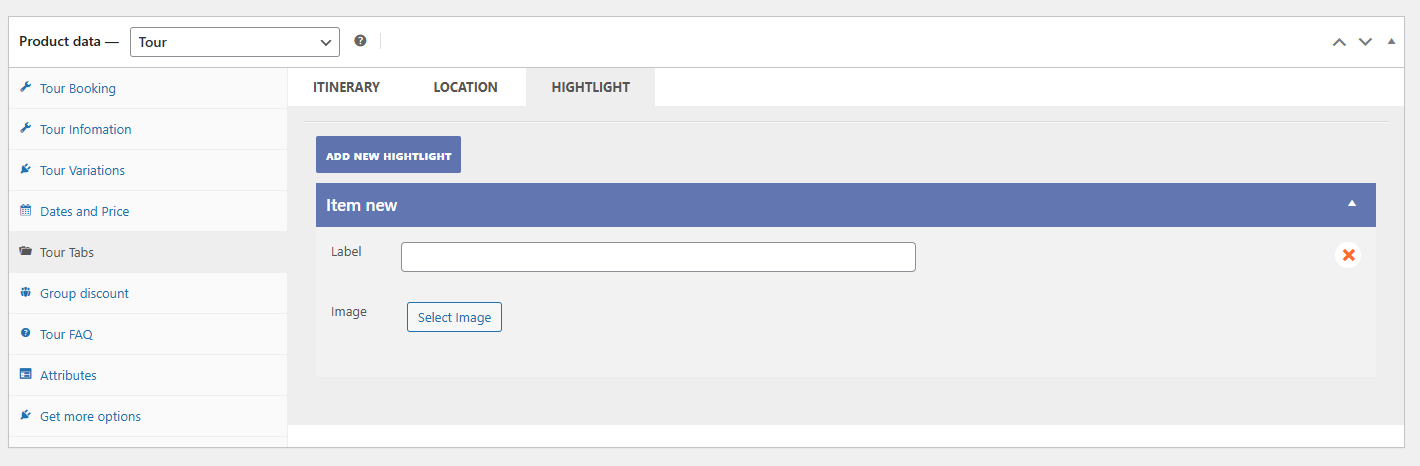
- You need to select product type that is tour and interesting in some tab as image above.
– In Tour Booking, You can input regular price and sale price and child Price.
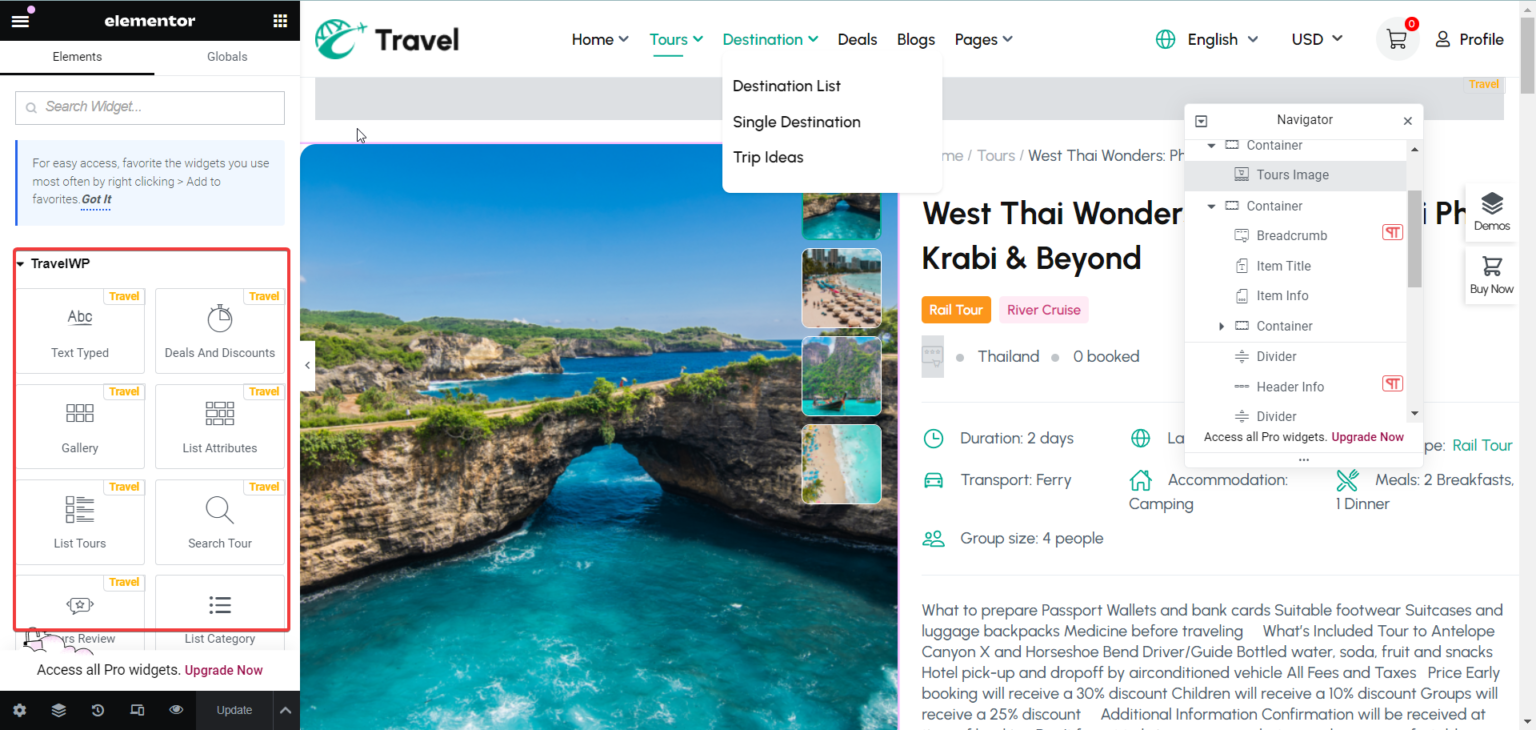
– In Tour Tab, You can config Interary and Location. You can configure Interary to add and change content. You can add shortcodes to add content:
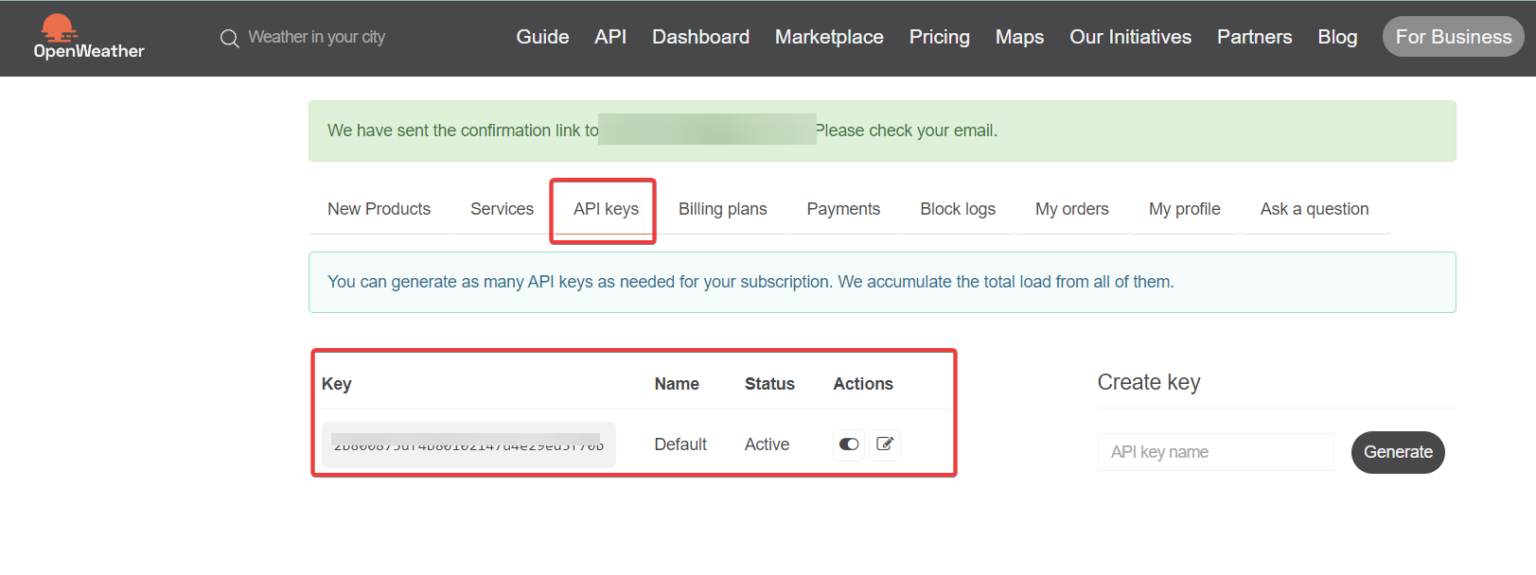
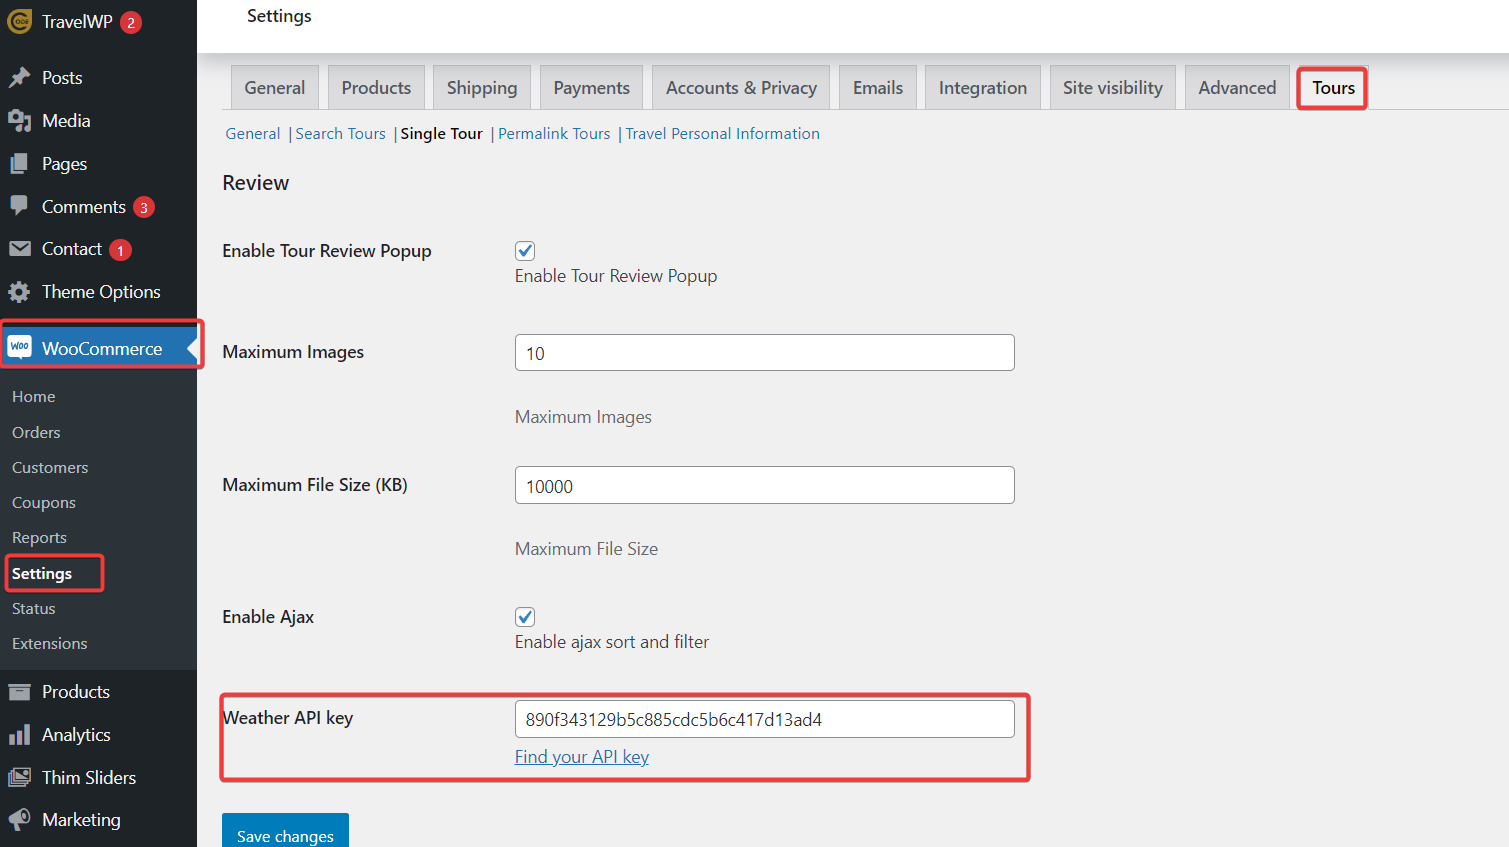
To display weather in tour, you need to go to Woocommerce -> Settings -> Tour -> Single tour -> Find your API key -> register your account -> then you will have API key.
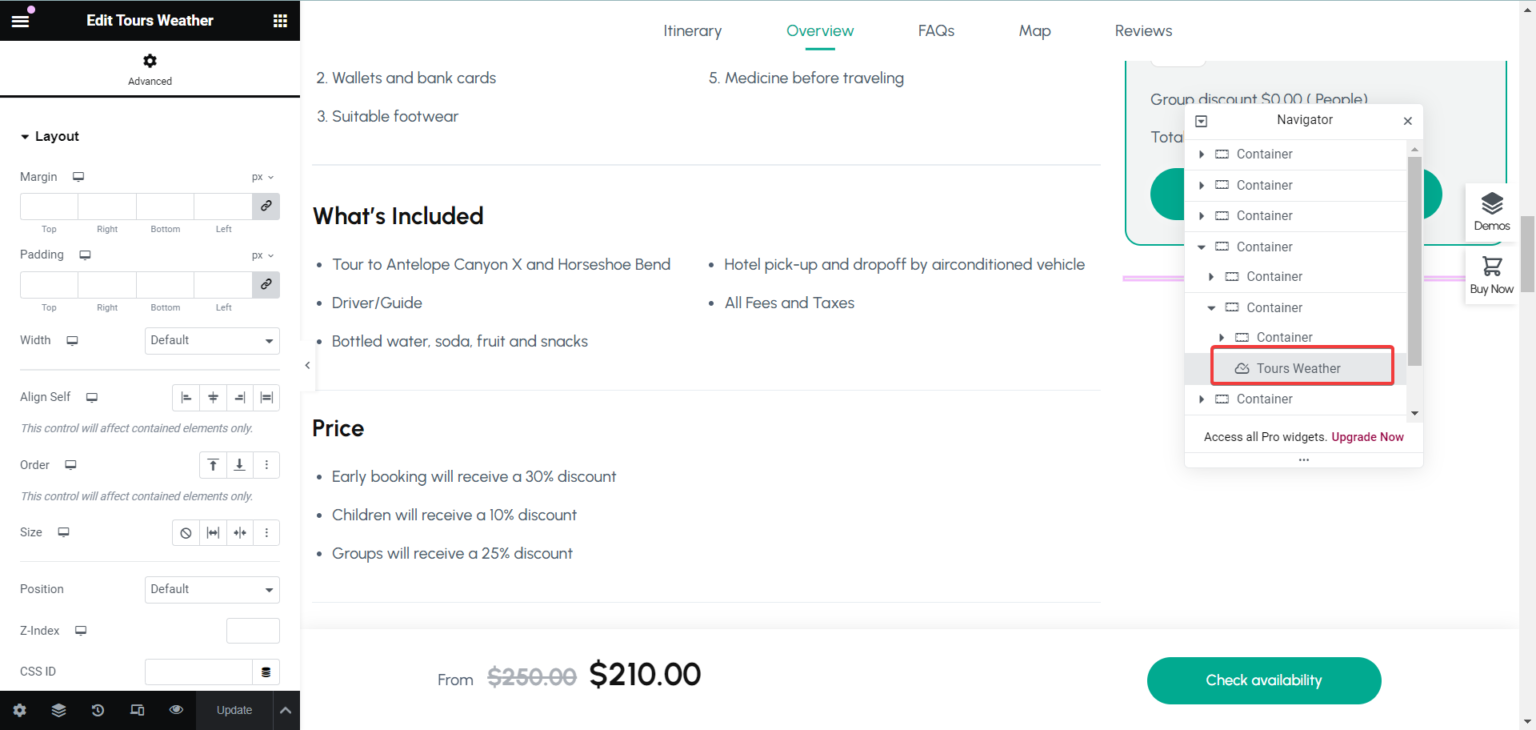
You can create your own single tour page in Thim Elementor. Please use the Weather Tours widget.
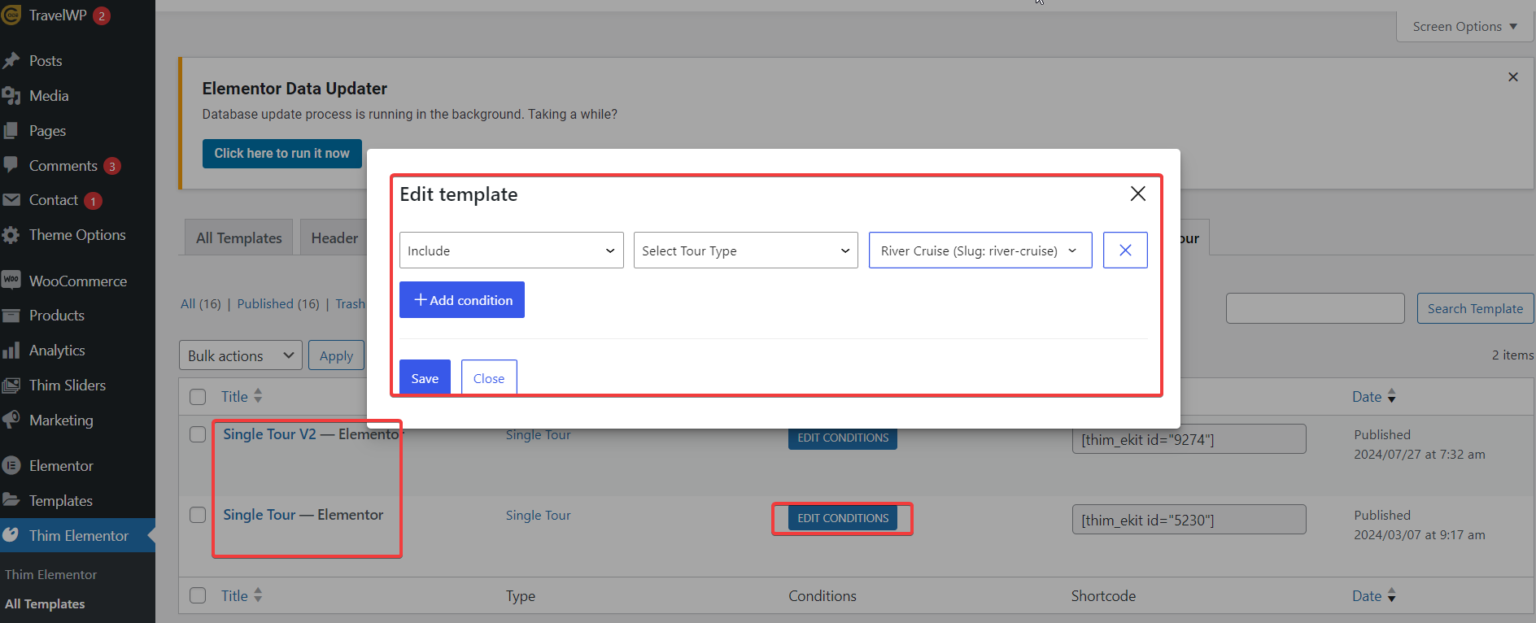
In Elementor, you can create a single tour with our Travelwp tab assigned widget. Then you can assign Conditions to it.
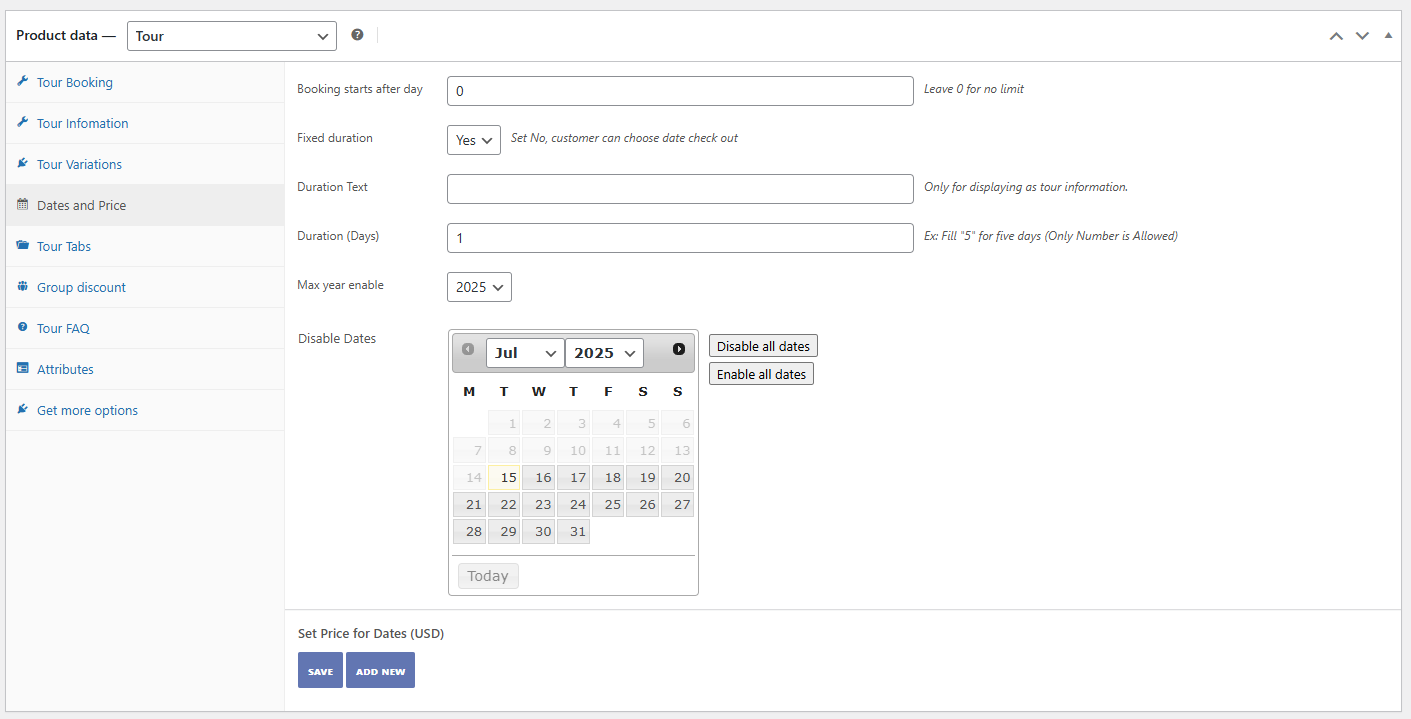
– Dates and Price: Config date disable and set price for date
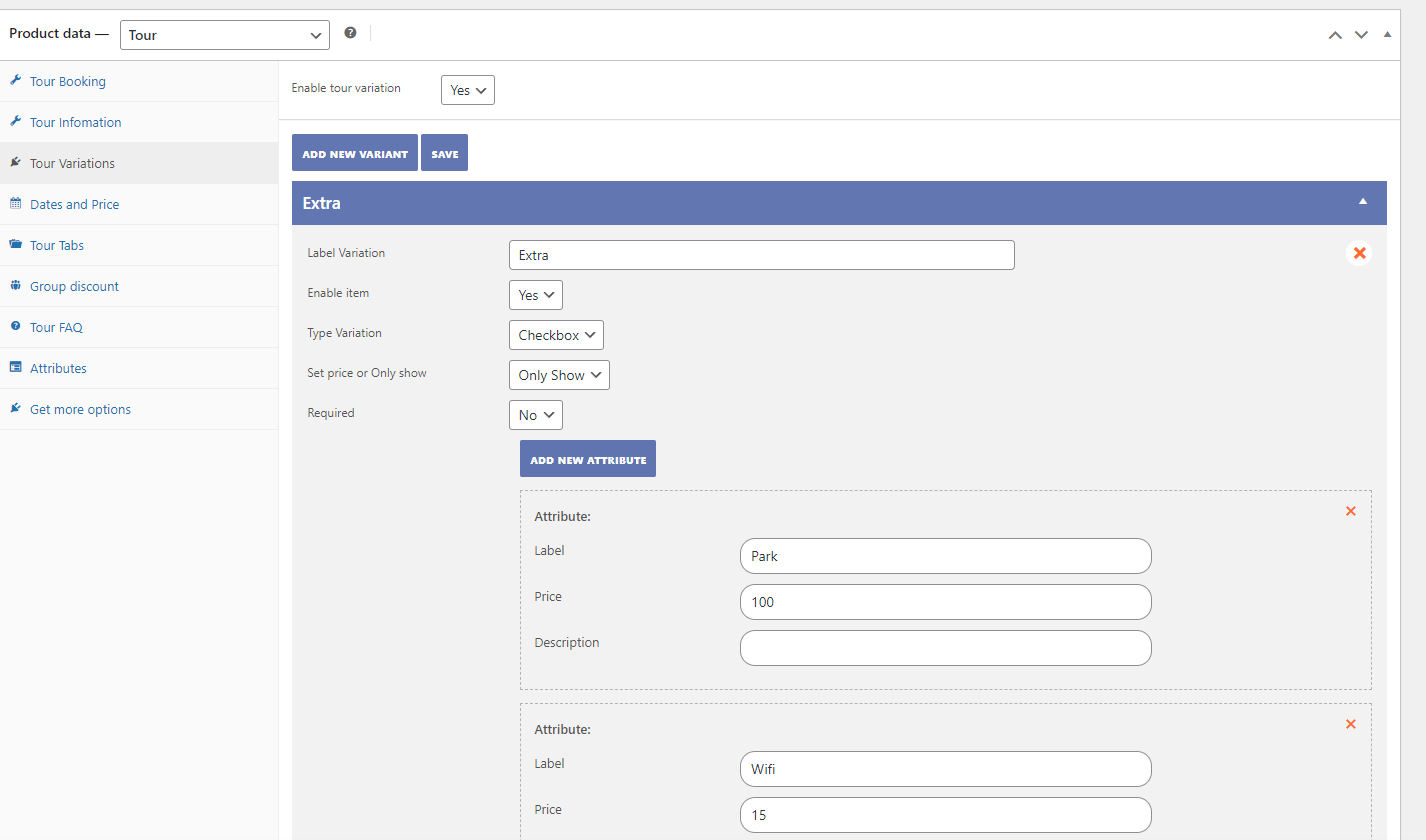
– Tour Variations: You can add more variations for tour
https://youtu.be/SdKxKZQ–Fk
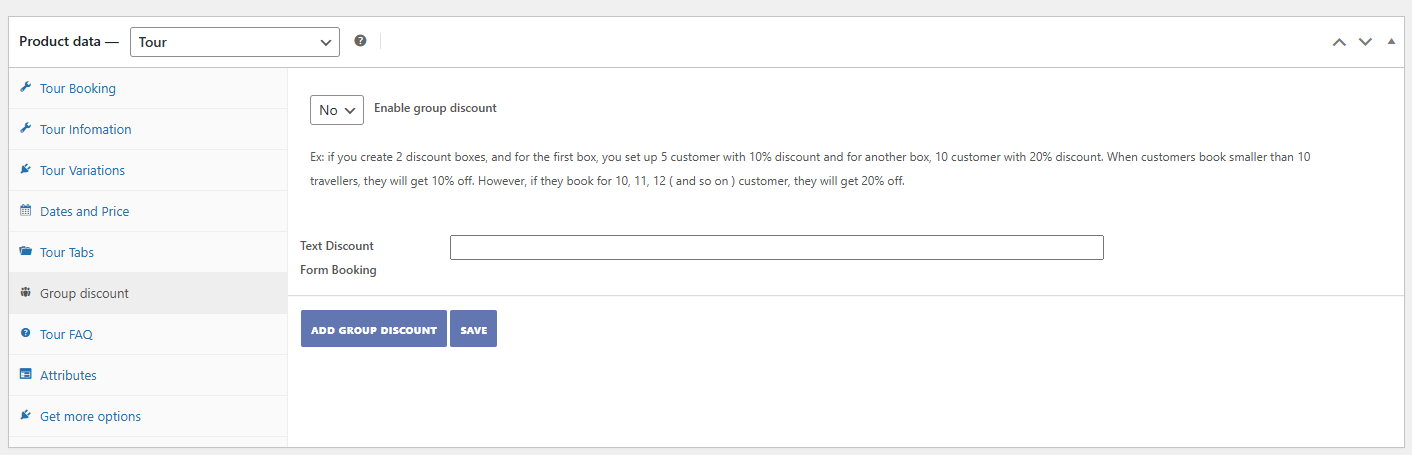
– Group Discount: If you create 2 discount boxes, and for the first box, you set up 5 customer with 10% discount and for another box, 10 customer with 20% discount. When customers book smaller than 10 travellers, they will get 10% off. However, if they book for 10, 11, 12 ( and so on ) customer, they will get 20% off.
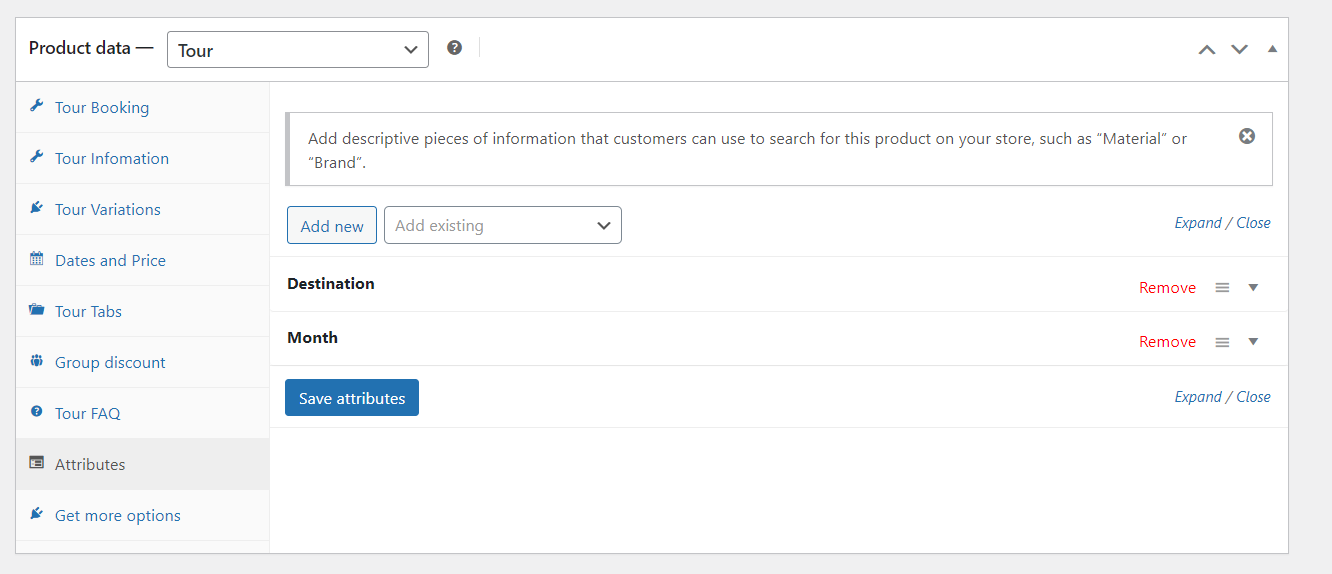
– In Attributes, you can set attributes for the tour.
– Tour Information, you can set Language, Transport, Accommodation, Meals, Group size.

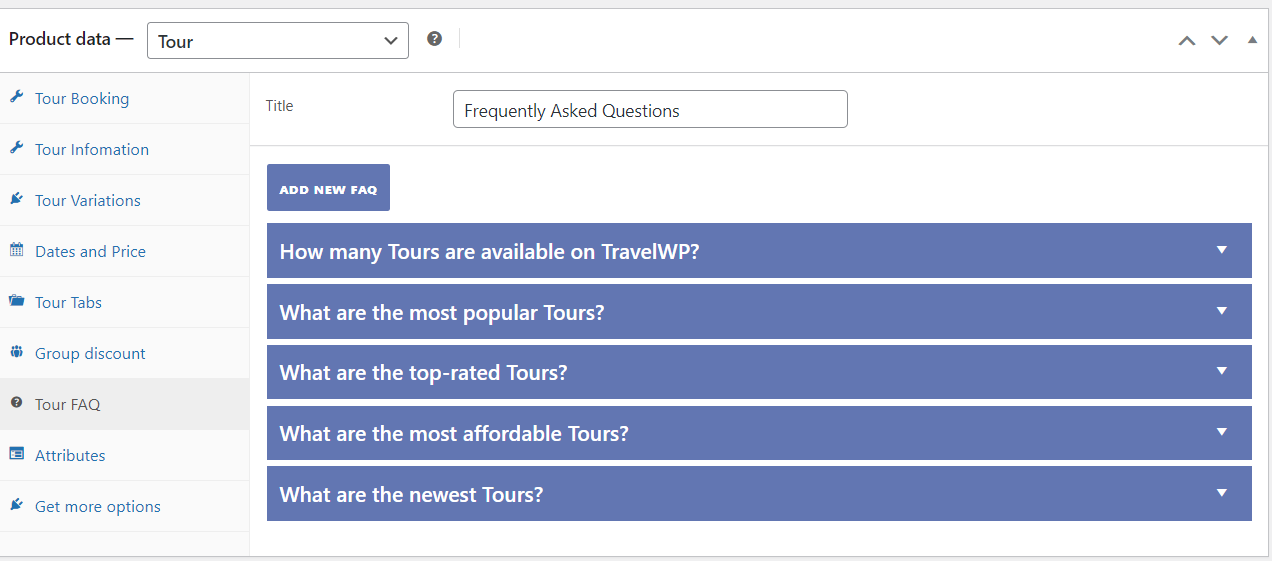
– Tour FAQ, where you can create frequently asked customer questions about the tour.